Wednesday, December 31, 2014
A Look Back
This post has been sitting in my drafts folder since Dec 2014...it was a look back at the beginnings and well here it is 7 months later and I have yet to post this so here it is.
My first blog on this site was a recipe to extend the usefulness of your butter.
First Blog: Butter Spread
A really great site for food storage information is found at LDS.org Longer-Term Food Storage, additionally, there is a lot of information at www.providentliving.org, another LDS site.
One of the first sites I started following was myfoodstoragecookbook.com This site is so full of information, tips, and ideas, I can only wish I was that good.
I located a great CDC blog on the Zombie Apocalypse and printed several copies to hand out at one of our week-night Relief Society meetings. The younger women got a great laugh, the older women, not so much.
These useful topics are covered in the All is Safely Gathered In, basically, 3-month food storage, water, financial reserve and long term food storage.
Some of the most favorite requests for information have been on water storage, cooking with food storage, and gardening.
Yes I've been doing this a while and I love it. I can only keep what I have by giving it away. If you have any suggestions or requests for information, be sure to let me know.
Tuesday, December 2, 2014
Disaster Plan for Your Pets
We pamper our pets with all kinds of silly items, I even crocheted a reflective safety vest for my dog.
 |
| Not so shiny inside |
 |
| Very shiny outside |
They become members of our families, yet when we make our disaster plans, those very same pets are often overlooked. We don't do it on purpose, it just happens.
These animals rely on us for food, shelter, love and protection. We have taken on the commitment to care for them. Sounds just like our responsibilities to our children.
Hurricane Katrina brought about the glaring need for creating a disaster plan for our pets as well as ourselves.


Photos from Animal Rescue New Orleans
A quick trip to the Humane Society of the United States website will take you to a Disaster Plan for Your Pets
 |
| Cats and Dogs living together. TEOTWAWKI. |
Sunday, November 30, 2014
Christmas Goodies
So my list of Christmas goodies goes something like this
This recipe was in the 1963 Betty Crocker Cookbook. It is the recipe I grew up with. When I moved out on my own and got my first Betty Crocker Cookbook (1980) the sugar cookie recipe was different. I tried the recipe and hated it. I memorized Mary's Sugar Cookies recipe and have been using it ever since.
There is only one alteration I have ever made to the original recipe, I didn't have almond extract one year, so I used orange extract instead. My mother absolutely loved the change and I always made hers with the "new" recipe.
My mom taught me to use a butter cream frosting, but it didn't harden and when the cookies were stacked on a plate, the frosting from the cookie below would stick to the back of the cookie on top. Now this is not necessarily a bad thing, but when I've put so much effort into decorating I don't want them to get messed up.
I've shared this link with you for the frosting recipe only. I wouldn't recommend the sugar cookie recipe, too close to Ethel's for my taste, but hey, it's your cookie, use whatever recipe you want.
Sweet & Saltines (aka Christmas Crack)
Last year, my daughter introduced me to this. I made pan after pan after pan. Yes a pan or two did make it out the door, but I ate more than I shared. It is truly addictive.
Fantasy Fudge (original recipe)
Who in the last 40 years hasn't had Fantasy Fudge? I have it every year, I even make it in the spring, summer and autumn (why wait until once a year to eat fudge?). Apparently, Kraft Foods has changed the recipe for Fantasy Fudge. I'm guessing...because Nestle semi-sweet chocolate chips are not owned by Kraft Foods, where as Baker's semi-sweet chocolate is, go figure. If you'd like to try the new recipe for Fantasy Fudge, go here.
Each family has it's own list of Christmas goodies, I thought I would share mine to help get you in the goodies mood. Happy cooking!
The Foray into Pinterest
Pinterest, as all users know, is addictive. You start out looking for a crochet pattern and end up an hour or so later creating a board full of "Honey Do's". You know what I'm talking about. I avoided Pinterest like the flu for the first couple of years that it existed (I still don't have an instagram account). It sounded like a waste of time to me and well...
I've been on Pinterest for a year or two now. I've even pinned items from this blog, but I only had a personal account and not one associated with Shadle Park Provident Living, so I decided to create an account just for this blog, only because I'm pretty sure that if you read this blog, you don't want to see pins about Scouting, crocheting, or Wood Badge. If you do, you can always look me up and follow me, otherwise at least check out some of the boards I've created specifically for SPPL.
I'm am going to try to sort the boards by subject matter, such as food preservation, emergency preparedness, you get the idea. I will tell you now that as with all other things found on the internet, some things may not be a good idea (such as oven "canning" perishable foods) and I will try to weed out those pins as I go along. I will also check the links as I go. No sense in repinning something that goes no where.
So here you go, if you would like to follow SPPL boards, you'll find the widget just under the blog archives to the right. Have fun, see you in a couple of hours. LOL.
Thursday, November 13, 2014
Compassionate Service Cookbook
A few years ago, I had a medical event and the sisters in my ward were wonderful delivering meals while I recovered. My husband and son were not reduced to eating PB&J tortillas, mac & cheese, and hamburgers. When asked what I could eat now, I replied no salt, low fat foods. We got lasagna (of course), breads, spaghetti with chicken, green salads, and a variety of other pasta dishes. I am very grateful for all the sisters did for our family during this time. Unfortunately, I couldn't eat most of the foods these sisters so loving produced. I give them an A for effort, but most don't understand the nature of commercially processed foods.
This led me to an idea, a Relief Society Compassionate Service Cookbook. The idea was that the sisters were to share recipes specific to medical dietary needs such as diabetes, celiac disease, hypertension, etc. I would compile these recipes into a booklet that could be shared so that when certain people needed meals, the sisters could be more prepared with ideas. Our R.S. president was very excited and she told the Stake R.S. president who contacted me and asked that I share with her when it was complete. Wow, this must be a great idea. Anyway, to make this very long story shorter, I got a few recipes, but not enough...so the idea kinda died off.


I got to thinking again about this cookbook and I've decided to go ahead and write it. It will be a compilation of recipes found all over the internet. No recipe will be included if I have not tried it out on my family first. I know that the pictures may look fantastic, but the dish tastes like _____. Or the dish is more complicated to make than it should be. I can also get the opinions of my husband and son who have very different likes and dislikes.
If you have a recipe you think would be great to include in this book, please share.
Send the recipe to shadleparkpl@gmail.com
This led me to an idea, a Relief Society Compassionate Service Cookbook. The idea was that the sisters were to share recipes specific to medical dietary needs such as diabetes, celiac disease, hypertension, etc. I would compile these recipes into a booklet that could be shared so that when certain people needed meals, the sisters could be more prepared with ideas. Our R.S. president was very excited and she told the Stake R.S. president who contacted me and asked that I share with her when it was complete. Wow, this must be a great idea. Anyway, to make this very long story shorter, I got a few recipes, but not enough...so the idea kinda died off.

Every once in a while, I run across this file on my computer that has the layout, design, some recipes all for this cookbook. I glance at it, even might put a new recipe in there, but nothing much happens after that. This past week I made a trip to the library and was in the cookbook section. There were cookbooks for ADD/ADHD, diabetes, autism, hypertension & cardiac disease, pregnancy, on and on. And even though I collect cookbooks, recipes and the like, I don't have cookbooks specific to each of these diseases. I don't think anyone does, nor do I intend to.


These books are all available at www.amazon.com
If you have a recipe you think would be great to include in this book, please share.
Send the recipe to shadleparkpl@gmail.com
Wednesday, November 12, 2014
It's Been Found at Last - Tomato Jelly

I was never into making jams and jellies, it looked too complicated and I had no idea what a jelly bag was. That was about ten years ago and then I had one of those bumper crops of tomatoes.

I made tomato sauce, soup, salsa, pasta sauce, diced tomatoes, stewed tomatoes.

Then I happened on a recipe for tomato jelly. Actual jelly, not a preserve, or jam, but real jelly. So having no clue how to do this properly, I followed the directions and man oh man, it was the best jelly ever. The kids were eating it straight out of the jar. (I had to bean them once or twice to get them to stop) This stuff is even better than grape jelly. Time goes buy and I don't have such bumper crops in the ensuing years and there is tons of tomato jelly on the shelf (or so I thought).
This year was a really weird growing season. It was warm early (May was in the 50s) and warm late (October was in the 80s). We didn't get our first frost until a few days ago and we are sitting in the middle of a deep freeze now. (Temps are in the teens). Anyway, the tomatoes didn't ripen on the vine. I had about three bushels of green tomatoes still on the plants. Mid October, fearing a freeze, I harvested the green tomatoes, placed them in a cardboard box and waited for them to ripen. I had to do a second harvest a week later. In all I ended up with nearly two and a half bushels.
I had already put up plenty of tomato products from those that had ripened earlier, so what do you do with so many tomatoes after they ripen? You make jelly of course! So I looked in my recipe file, in my cookbooks, in my secret recipe hiding place (I really need to organize that), and even online. Nope, couldn't find it. (it had been a few years) A Google search for "tomato jelly" brought about 1,900,000 results (0.40 seconds). So I looked at about 50 different sites for the recipe, all but one were recipes for jams, conserves and the like. There are even recipes that use canned tomato juice and Jello that are called jellies, really?
Preserves is used to describe all types of jams and jellies.
Jam typically contains both the juice and flesh of a fruit or vegetable
Conserve or whole fruit jam, is a jam made of fruit stewed in sugar.
Jelly refers to a clear or translucent fruit spread made from sweetened fruit (or vegetable) juice.
I don't remember what I searched for or how I got there, but I found a tomato JELLY recipe finally. I cannot express how excited I was. It wasn't the same recipe, but I could work with it.
This is not a step by step tutorial, just pictures as I worked.
 |
| Sliced Romas (yes I use a filet knife) |
 |
| Cooking it down |
 |
| After it's drained |
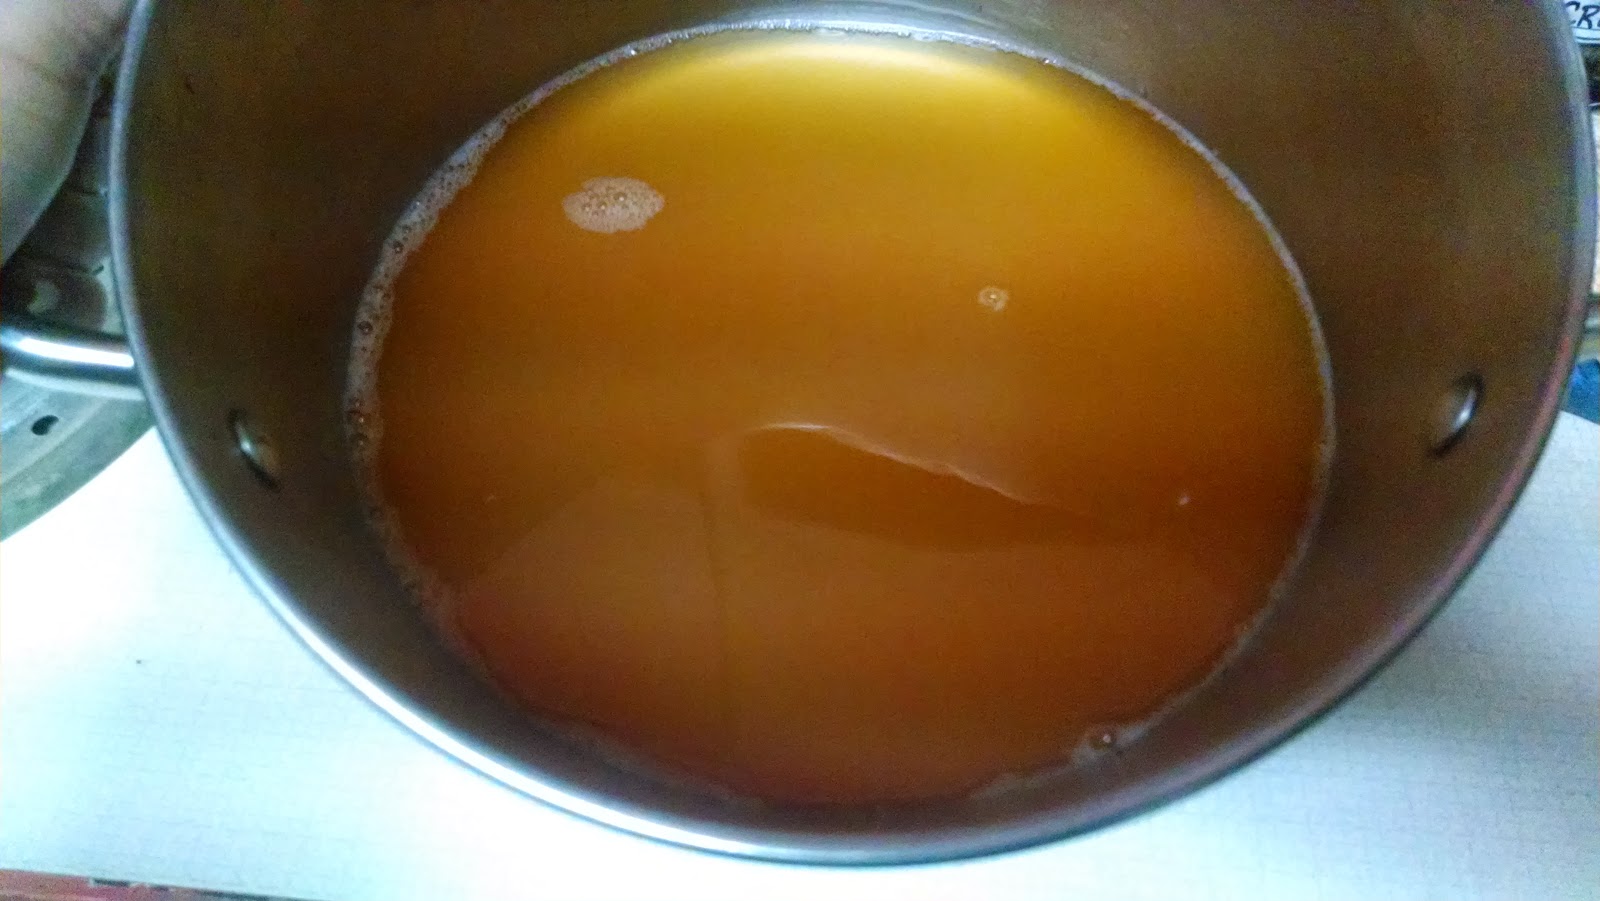 |
| This is tomato juice |
 |
| See how clear it is |
 |
| Jars are filled |
 |
| Finished Product. Ain't it purdy?
And now for the recipe (adapted from Bernardin Pectin)
Tomato Jelly
Yield 7-1/2 pints
8 cups (2L) sliced tomatoes
1/2 cup (125 ml) water
2 tsp pepper sauce (I used Tabasco)
3/4 cup (175 ml) coarsely chopped fresh basil or
1 tbsp (15 ml) dried basil
2 tbsp (30 ml) lemon juice (lime juice works too)
1 pkg powdered pectin
3-1/4 cups (800 ml) granulated sugar
1/2 tsp butter or margarine (optional)
• In a large deep stainless steel saucepan, combine tomatoes, water, pepper sauce and basil. Bring to a boil over medium heat. Reduce heat and boil gently, stirring and crushing tomatoes occasionally, until tomatoes are softened, about 25 minutes.
• Transfer tomato mixture to a dampened jelly bag or a strainer lined with several layers of dampened cheesecloth set over a deep bowl. Let drip, undisturbed, for about 2 hours. Measure 1-3/4 cups (425 ml) tomato juice. If you do not have the required amount, add 1/2 cup (125 ml) boiling water to the remaining pulp in the jelly bag to extract additional juice. (Or add unsweetened apple or white grape juice to extend the juice to the required measure.)
• Place 7 clean 1/2 pint (125 ml) mason jars on a rack in a boiling water canner; cover jars with water and heat to a simmer (180°F/82°C). Set screw bands aside. Heat lids in hot water, not boiling (180°F/82°C). Keep jars and lids hot until ready to use.
• Measure sugar; set aside.
• Transfer tomato juice to a large, deep stainless steel saucepan. Add lemon juice. Whisk in pectin until dissolved and add 1/2 tsp (2 ml) butter or margarine to reduce foaming, if desired.
• Over high heat, bring mixture to a full rolling boil. Add all the sugar. Stirring constantly, return mixture to a full rolling boil that cannot be stirred down. Boil hard 1 minute. Remove from heat; skim foam if necessary.
• Quickly ladle hot jelly into a hot jar to within 1/4 inch (.5 cm) of top rim (headspace). Using nonmetallic utensil, remove air bubbles. Wipe jar rim removing any stickiness. Center hot sealing disc on clean jar rim. Screw band down until resistance is met, then increase to fingertip tight. Return filled jar to rack in canner ensuring jars are covered by water. Repeat for remaining jelly.
• When canner is filled, ensure that all jars are covered by at least one inch (2.5 cm) of water. Cover canner and bring water to full rolling boil before starting to count processing time. At altitudes up to 1000 ft (305 m), process – boil filled jars – 10 minutes.*
• When processing time is complete, turn stove off, remove canner lid, wait 5 minutes, then remove jars without tilting and place them upright on a protected work surface. Cool upright, undisturbed 24 hours; DO NOT RETIGHTEN screw bands.
• After cooling check jar seals. Lids curve downward and do not move when pressed. Remove screw bands; wipe and dry bands and jars. Store screw bands separately or replace loosely on jars, as desired. Label and store jars in a cool, dark place. For best quality, use home canned foods within one year.
|
Friday, November 7, 2014
I don't have any baking powder...what am I to do?

So I found this really fantastic recipe for no yeast donut holes. I couldn't wait to try them out.
Just look at the picture. Doesn't it make your mouth water? Don't you just want to make them and eat all 2 dozen before the kids get home? Yeah, me too. So I pulled all the ingredients out... except one...baking powder. Dag nabit, my mouth was watering for these sweet treats. Now what?
It isn't the end of the world however. I did what every good cook does nowadays, I searched the internet for a solution. The best solution I found was on joyofbaking.com and not only did I find a substitute for baking powder but also for stuff I didn't know I might need to substitute.
So I got them made. They were very good. They are also very gone. Shhhhhh, don't tell the husband, I'll make more later to share with him.
Anyway, so that you can enjoy these bitty treats just follow this link to Kelly's Justataste.com for the recipe. I do strongly suggest that you make a test batch before the kids get home, you know...so you can determine if it's something they'll like, then when you know that they will want them, make another batch to share with them. Shhhh...I'll keep your secret.
Thursday, September 11, 2014
Repurposing with a vengeance - dry goods storage
Repurposing project #3 - Reclaiming my mason jars
Are you one of those people that gets so much stuff in bulk you just don't know what to do with it all? Or how about one of those people who purchases stuff in #10 tins, opens it and then has no idea how to keep the unused portion from getting eaten by bugs or rodents. Has Waste Management offered to supply an industrial sized recycling bin for all of your soda bottles? Well have I got a new trick for you.
First and foremost. This method of storage is SHORT TERM (less than 2 years). Additionally, this method is to be used for NON-PERISHABLE goods only. If ever you are in doubt of the quality of the food, do not eat it.
 |
| Stuff that you will probably need. |
Empty 1, 2 or 3 liter bottles. Dried beans, peas, rice are best, but you can also store chocolate chips, dehydrated vegetables, pasta, etc. A large bowl, measuring cup or scoop, scissors, marking pen, packing tape. Make sure your working area is clean and dry.

Do I need to talk about safety here??? Okay, remember, the water is very hot and can burn you. The soda bottle will not insulate you from the hot water. Water that is too hot can melt the bottle increasing your chance of getting burned. Use a funnel to pour the water in to the bottle, trying to hold the bottle while pour scalding water into a narrow neck is...well, stupid. Children should be in another room...at grandma's...napping. Okay, sorry if I offended anyone, but I've seen just about every way a person can blow this and get burned. Oh and the bottle caps should be rinsed in scalding water as well.
Allow your bottles to dry COMPLETELY. Was that loud enough? Putting dried items into a moist bottle...just throw it away.


 |
| Using a paper funnel with Lima beans. |

 After you have filled your bottle (this is 1 pound) Cut the label off the front and the cooking directions off the back. You can cut off the nutritional info if you like, but I don't.


You know those bags of 15 bean soup or White bean soup with ham flavoring, well you can do a few of those as well. The only problem I came across was the flavoring packet. Sure, I could stuff it into the bottle, but I would have to destroy the bottle to get it back out, so my solution is simple. Cover the flavor packet with a piece of plastic (to keep it from ripping open when the tape is removed) and tape it to the side of the bottle. *Warning* This will not keep your flavor packet from becoming wet or infested or losing it's flavor. It just keeps the packet with the soup. When in doubt, throw it out.

Sooo... to recap so far, clean bottles, insert food, bay leaf, and oxygen absorber, cap bottles, label them with contents and cooking directions. Now what?? Oh yeah...

 Get your household wax out and scrape off a bit. Now melt said household wax. I don't happen to have dedicated wax melting pots, but a reused potpie pan works just fine.
 Don't forget, the water is hot. I won't go over that one again. Remove melted wax pot (potpie tin) from the pan of water and then dip the tops of the bottles in the wax. Allow to cool. Repeat 3 or 4 times.
This seals the bottle to prevent insects and moisture from getting in. With the addition of the oxygen absorber, the chance of insect growth becomes negligible.

A one liter bottle will hold this much in White Beans. But keep in mind, each bean is different, size means nothing. Check out the picture below. The smaller ones can be more dense. In this example a bottle can hold more of the split peas than the black eyed peas.


Oh and about that "don't use plastic to store stuff because of leaching". Leaching of chemicals into food from plastic bottles requires liquid, dry items should not pick up any chemicals, but I'd like to remind you that you probably consumed the liquid that was in the bottle in the first place and how long were those sitting on the shelf before you opened it?
 |
| The best kinda beans. |
Wednesday, September 10, 2014
Repurposing with a vengeance - the stove
Repurposing project #2: RV stove top outdoor kitchen - this idea also came off Pinterest.
I do as much canning as I am able, however a lot of that comes during the hottest parts of the summer and I don't have an a/c cooled kitchen. The first day its not so bad, but by day three, I just don't want to be that hot anymore. So I looked around for a way to do my canning outdoors.
I did manage a couple of batches in my pressure canner on the campstove. It worked great, but I did have to keep pumping the pressure back up because it had to be on so long. I also tried it on the side burner of the BBQ (propane) It also worked fine, but the weight of the canner had to be counterbalanced. I wasn't comfortable doing it again. One other problem was wind, keeping a constant temperature was difficult.
 |
| This would be ideal |
 |
| I could work with this |
 |
| Even this would do |
I did manage a couple of batches in my pressure canner on the campstove. It worked great, but I did have to keep pumping the pressure back up because it had to be on so long. I also tried it on the side burner of the BBQ (propane) It also worked fine, but the weight of the canner had to be counterbalanced. I wasn't comfortable doing it again. One other problem was wind, keeping a constant temperature was difficult.
In the South, there are homes that have what are termed "Summer"kitchens. These are basically kitchens that are completely separate from the rest of the house. They are used for essentially canning, baking during the summer, and other food preparation that is hot and humid. By using the summer kitchen, the home remains cooler because the additional heat and humidity are some place else. I've seen these kitchens as either add-ons to a house or a screened in porch that has been converted. I don't have money to build an add-on and I don't have a screened in porch to convert. What's a girl to do?
I was looking for outdoor ideas for my hubby to do (I'm good to him like that) and found the picture of a three burner, propane fired cooktop in a wood frame. I had found it, just what I wanted for canning outdoors. Now to find the parts I needed. I did quite a bit of looking, placing ads on different sites, asking neighbors and friends, and watching for rv's in the paper. I figured that was going to be the easiest way to locate a propane fired cook top. Hey, remember that windstorm that wiped out my greenhouse? Well we had another one just 10 days later and one thing I noticed on my morning walks was a bunch of RV's and travel trailers demolished by trees. So I began knocking on doors and pleading on social media asking to salvage the cook top from a damaged RV. A few weeks went by and finally someone called and asked if I was still looking. They had a cooktop they could sell me for $30.00. Egads!!! Not what I was hoping for. We haggled and I finally got it down to $12.00.
 |
| Picture from Pinterest |
With the picture from Pinterest firmly in my mind, I was extremely disappointed when the people showed up with the cook top. What they brought to my house was a stove/range from a motorhome from the 70's (okay, not that old) and it certainly didn't fit the sleek cooktop look I was envisioning.
In addition, they also offered the sink and water reservoir at no extra charge. I've gotta say, my brain caught fire, of course I would take those off their hands. (more on that another day). They were very grateful that I could take this stuff from them and I was grateful I got a stove/range, sink and water reservoir all for $12.00...delivered!

Using an old BBQ which had been designated for building that outdoor kitchen I wanted (two years ago), my handy husband set out to fit the appliance into the frame.
He removed the BBQ barrel and set about measuring, cutting, welding, measuring, grinding, and did I mention measuring?
 He inspected the propane lines and decided that he would need to get a new gas line to go to the propane tank and a new regulator as well. This was about $60.00 at the big box store.
I kept sneaking out to see how it was coming, but you see those nifty orange things over his ears? Those are the "Huh?" devise or the "ignore the wife's question about how it is coming" tool

Any way, after he was done ignoring my silly questions, this is what he built. Ugly I know, but I was super excited, I had an outdoor kitchen, sort of.
Of course I posted this picture right away on that social site we all are starting to deny we are part of, you know which one I'm talking about. The responses were varied, everything from "that's so Redneck" to "I wonder if the insurance company will let me keep the oven from our totaled RV?"

I had to try it out right away (not for canning) and decided to cook dinner and dessert on my new outdoor kitchen. This was the 21st of August and if I remember correctly it was pretty warm outside, so the timing was perfect.
What you see there is spaghetti in progress and chocolate chip cookies baked and ready to eat (which I did as soon as they were cool enough to get off the tray)
 In the end I removed the old side burner, cut new wood for the "counter", stained and urethaned the heck out of it. The husband fabricated a windbreak on the back and since I can turn the cooktop, I can place that break where I need it. I've canned to my heart's content on this new stove and it's been fabulous. Redneck? Maybe...but my house is not hot.
Subscribe to:
Posts (Atom)