Showing posts with label Preparedness. Show all posts

Thursday, September 11, 2014

Repurposing with a vengeance - dry goods storage

Repurposing project #3 - Reclaiming my mason jars

Are you one of those people that gets so much stuff in bulk you just don't know what to do with it all? Or how about one of those people who purchases stuff in #10 tins, opens it and then has no idea how to keep the unused portion from getting eaten by bugs or rodents. Has Waste Management offered to supply an industrial sized recycling bin for all of your soda bottles? Well have I got a new trick for you. 

First and foremost. This method of storage is SHORT TERM (less than 2 years). Additionally, this method is to be used for NON-PERISHABLE goods only. If ever you are in doubt of the quality of the food, do not eat it. 

Stuff that you will probably need.
Empty 1, 2 or 3 liter bottles. Dried beans, peas, rice are best, but you can also store chocolate chips, dehydrated vegetables, pasta, etc. A large bowl, measuring cup or scoop, scissors, marking pen, packing tape. Make sure your working area is clean and dry.


Prepping the plastic bottles. Remove the labels. don't use anything sharp or you may ruin the bottle. Rinse the bottle with the hottest water your tap provides. If your tank is set below 120° you may want to heat some water to no more than 150° and rinse the bottles. 

Do I need to talk about safety here??? Okay, remember, the water is very hot and can burn you. The soda bottle will not insulate you from the hot water. Water that is too hot can melt the bottle increasing your chance of getting burned. Use a funnel to pour the water in to the bottle, trying to hold the bottle while pour scalding water into a narrow neck is...well, stupid. Children should be in another room...at grandma's...napping. Okay, sorry if I offended anyone, but I've seen just about every way a person can blow this and get burned. Oh and the bottle caps should be rinsed in scalding water as well. 
Allow your bottles to dry COMPLETELY. Was that loud enough? Putting dried items into a moist bottle...just throw it away.


Okay, now that your bottles are ready, gather your items and begin. Place your bottle into a large bowl.

Find the method that works best for you to get the items (beans, rice, etc.) into the bottle. A funnel can be helpful, but may sometime clog, a paper funnel may be more useful for larger items (Lima beans, chocolate chips), but the method that works the best for me is the hand funnel, you know wrapping your hand around the neck of the bottle. No matter what method you use, there will be spillage, hence the large bowl. Hopefully anything that misses the bottle will land in the bowl. 


Using a paper funnel with Lima beans.
After you have filled your bottle (this is 1 pound) Cut the label off the front and the cooking directions off the back. You can cut off the nutritional info if you like, but I don't.
 
Use the packing tape to secure the labels to the bottles. Pick a spot and write the month and year you packed this bottle.


Before putting the cap on, add a bay leaf to the bottle if it is beans (everything else, you won't need it). The bay leaf has one function, to season the beans. There are many people who believe that bay leaves are good for keeping insects out, but it is just not true. Read this report from 1984 and see for yourself the best way to keep insects from infesting your food stuffs. The contents of the bottle will not pick up any flavoring until the bay leaf is cooked with it. Now add an oxygen absorber, Cap your bottle.

You know those bags of 15 bean soup or White bean soup with ham flavoring, well you can do a few of those as well. The only problem I came across was the flavoring packet. Sure, I could stuff it into the bottle, but I would have to destroy the bottle to get it back out, so my solution is simple. Cover the flavor packet with a piece of plastic (to keep it from ripping open when the tape is removed) and tape it to the side of the bottle. *Warning* This will not keep your flavor packet from becoming wet or infested or losing it's flavor. It just keeps the packet with the soup. When in doubt, throw it out.


Sooo... to recap so far, clean bottles, insert food, bay leaf, and oxygen absorber, cap bottles, label them with contents and cooking directions. Now what?? Oh yeah...

Get your household wax out and scrape off a bit. Now melt said household wax. I don't happen to have dedicated wax melting pots, but a reused potpie pan works just fine.


Don't forget, the water is hot. I won't go over that one again. Remove melted wax pot (potpie tin) from the pan of water and then dip the tops of the bottles in the wax. Allow to cool. Repeat 3 or 4 times.

This seals the bottle to prevent insects and moisture from getting in. With the addition of the oxygen absorber, the chance of insect growth becomes negligible.


A one liter bottle will hold this much in White Beans. But keep in mind, each bean is different, size means nothing. Check out the picture below. The smaller ones can be more dense. In this example a bottle can hold more of the split peas than the black eyed peas.

Juice bottles work just as well and they even have thicker plastic walls. The openings are also larger so getting an oxygen absorber in with the beans becomes easier. They also tend to be square so can be stacked more easily.

Oh and about that "don't use plastic to store stuff because of leaching". Leaching of chemicals into food from plastic bottles requires liquid, dry items should not pick up any chemicals, but I'd like to remind you that you probably consumed the liquid that was in the bottle in the first place and how long were those sitting on the shelf before you opened it?


The best kinda beans.

Wednesday, September 10, 2014

Repurposing with a vengeance - the stove


Repurposing project #2: RV stove top outdoor kitchen - this idea also came off Pinterest.

I do as much canning as I am able, however a lot of that comes during the hottest parts of the summer and I don't have an a/c cooled kitchen. The first day its not so bad, but by day three, I just don't want to be that hot anymore. So I looked around for a way to do my canning outdoors.

This would be ideal


I could work with this


Even this would do


I did manage a couple of batches in my pressure canner on the campstove. It worked great, but I did have to keep pumping the pressure back up because it had to be on so long. I also tried it on the side burner of the BBQ (propane) It also worked fine, but the weight of the canner had to be counterbalanced. I wasn't comfortable doing it again. One other problem was wind, keeping a constant temperature was difficult.

In the South, there are homes that have what are termed "Summer"kitchens. These are basically kitchens that are completely separate from the rest of the house. They are used for essentially canning, baking during the summer, and other food preparation that is hot and humid. By using the summer kitchen, the home remains cooler because the additional heat and humidity are some place else. I've seen these kitchens as either add-ons to a house or a screened in porch that has been converted. I don't have money to build an add-on and I don't have a screened in porch to convert. What's a girl to do?

I was looking for outdoor ideas for my hubby to do (I'm good to him like that) and found the picture of a three burner, propane fired cooktop in a wood frame. I had found it, just what I wanted for canning outdoors. Now to find the parts I needed. I did quite a bit of looking, placing ads on different sites, asking neighbors and friends, and watching for rv's in the paper. I figured that was going to be the easiest way to locate a propane fired cook top. Hey, remember that windstorm that wiped out my greenhouse? Well we had another one just 10 days later and one thing I noticed on my morning walks was a bunch of RV's and travel trailers demolished by trees. So I began knocking on doors and pleading on social media asking to salvage the cook top from a damaged RV. A few weeks went by and finally someone called and asked if I was still looking. They had a cooktop they could sell me for $30.00. Egads!!! Not what I was hoping for. We haggled and I finally got it down to $12.00.

Picture from Pinterest
With the picture from Pinterest firmly in my mind, I was extremely disappointed when the people showed up with the cook top. What they brought to my house was a stove/range from a motorhome from the 70's (okay, not that old)  and it certainly didn't fit the sleek cooktop look I was envisioning. 


In addition, they also offered the sink and water reservoir at no extra charge. I've gotta say, my brain caught fire, of course I would take those off their hands. (more on that another day). They were very grateful that I could take this stuff from them and I was grateful I got a stove/range, sink and water reservoir all for $12.00...delivered!

Using an old BBQ which had been designated for building that outdoor kitchen I wanted (two years ago), my handy husband set out to fit the appliance into the frame.

He removed the BBQ barrel and set about measuring, cutting, welding, measuring, grinding, and did I mention measuring?

He inspected the propane lines and decided that he would need to get a new gas line to go to the propane tank and a new regulator as well. This was about $60.00 at the big box store.

I kept sneaking out to see how it was coming, but you see those nifty orange things over his ears? Those are the "Huh?" devise or the "ignore the wife's question about how it is coming" tool


Any way, after he was done ignoring my silly questions, this is what he built. Ugly I know, but I was super excited, I had an outdoor kitchen, sort of. 

Of course I posted this picture right away on that social site we all are starting to deny we are part of, you know which one I'm talking about. The responses were varied, everything from "that's so Redneck" to "I wonder if the insurance company will let me keep the oven from our totaled RV?"
I had to try it out right away (not for canning) and decided to cook dinner and dessert on my new outdoor kitchen. This was the 21st of August and if I remember correctly it was pretty warm outside, so the timing was perfect.

What you see there is spaghetti in progress and chocolate chip cookies baked and ready to eat (which I did as soon as they were cool enough to get off the tray)
In the end I removed the old side burner, cut new wood for the "counter", stained and urethaned the heck out of it. The husband fabricated a windbreak on the back and since I can turn the cooktop, I can place that break where I need it. I've canned to my heart's content on this new stove and it's been fabulous. Redneck? Maybe...but my house is not hot.


Tuesday, April 8, 2014

The Growing Season is Around the Corner

My windowsill starts
Have you started your seeds yet? It isn't too late for some of your veggies like tomatoes, peppers, and pumpkins. There are even some seeds you can plant out now, lettuce, onion seeds/sets, and cauliflower. 

Just a reminder though, don't get too vigorous with your planting yet, the last frost may occur in the first week of May. 

Okay, having said that I usually get my seeds in the ground in mid-April, 1st week of May. My garden is usually pretty successful.
My garden on August 17, 2013
I didn't use the space efficiently and it was a new spot so I didn't choose wisely for the sun, but I wasn't totally disappointed with the harvests. Again having said this...this year we have different plans. 

First, I decided where I am placing my plants based on the knowledge obtained last year as to where the sun hits and when. 

Second, I laid out my garden plan using a free garden planner I found at Growveg.com. You get a 30 day free trial of the planner and you can definitely plan out your garden space in that time. I was impressed with this website. 

Third, instead of burying my potatoes, I am going to try towers. I found a great plan at Growing Lot Suburban Farm. I will putting up 2 of these one with russets  and one with reds. 

Fourth, we are repurposing as much as we can including using a trampoline frame and free discarded wood to make a greenhouse. I'll post pictures of that later.  There are several "plans" out there, but some of them don't make a bunch of sense so we are doing it Jeff's way. But if you want to see what one can look like, check it out here...Organic Adventures in Farming. We also pulled some old metal shelves from the fabrication pile and have using other materials we had lying around, we now have starter shelves for our greenhouse. 

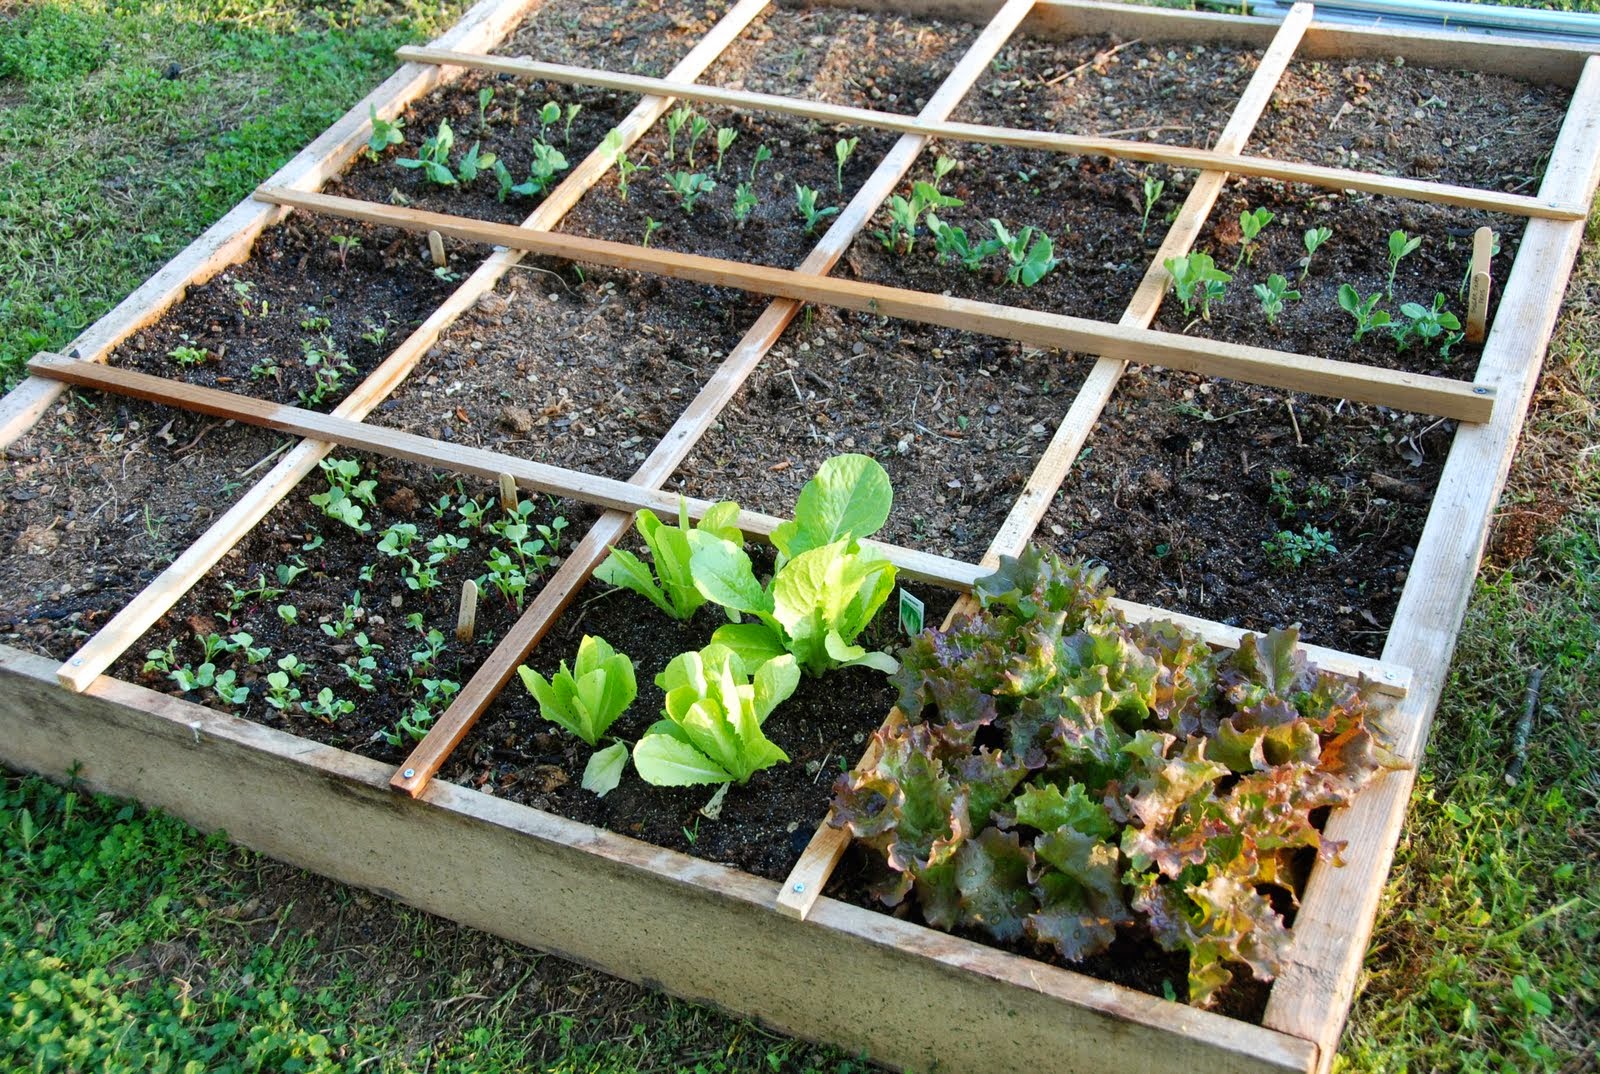
And finally, I am going to experiment with Square Foot Gardening. I've never tried it before, and in my case I have tons of room for rows, but the thought of planting 99 green bean plants is a bit overwhelming, but when it's laid out in a grid like this, it doesn't seem so daunting. We collected used 2" x 6" deck boards and have built our boxes. We had enough left over to build a couple for a daughter as well. I just happened to have some slats under my woodworking bench, so grids are no problem. This could be a way to reclaim some of my backyard.
photo courtesy of http://www.versusbattle.com
You can find pros & cons at VersusBattle.com of either SFG or row gardening.

Good luck and good gardening!


Wednesday, April 2, 2014

Every Penny Counts part two

Don't you hate it when you open a package of whatever (baking powder, granola, noodles) and don't use them all right away? I know I do. For instance, baking powder and baking soda, I don't use them daily, weekly or even monthly. So they sit in the cupboard and well...age out. I also hate having to throw them away. One way to extend the life of these dry goods is to vacuum seal them.

Many moons ago I purchased a Food Saver® vacuum sealing system. I only use the rolls, only because not everything I seal up is the same size, but if you like you can purchase bags. I use this to vacuum seal bulk meats mostly, but I've used it for soups, vegetables from my garden and important documents (i.e.birth certificates). I also use it to extend the life of those things I don't use very often, such as baking powder.

Opened and not used up.
Instructions for cooking the Quinoa taped on back of jar.

Food Saver® brand vacuum sealing system
Food Saver® is but one brand, there are others out there, this is just what I happen to have. Items that you will need are jars (1/2 pint, pint, quart or half gallon), lids to fit the jars and a sealing system. If you are going to seal powdery items (soda, confectioners sugar, flour) be sure that you wipe the rim of the jar with a damp paper towel and always leave 1" headspace. 

When I did my confectioners sugar, there was sugar EVERYWHERE!

Sometimes it does not seal the first try or the second or the third. It usually means something is wrong. I tried several times on one jar and then checked the rim, yep, there was a chip, silly me. Once there was extra rubber on the lid, not an issue if you are heat canning, but it is when vacuum canning. Another time, powder had seeped into the sealer and a vacuum couldn't be formed. With a little patience and a bit of observation, almost all jars will seal...except fancy jelly jars. Nope, they don't seal. I tried, I really did, but no, it was not gonna happen.


Vacuum sealing is not a replacement for heat canning. 

It should be used for dry goods or freezer only. 

See those bread crumbs, opened but not used up. Now I can use them later.
As to those spiffy labels, I found them online at Canning Homemade. Wonderful to work with, but a hint here as well. These are shrink sleeves, you dip the jar into a pot of boiling hot water, the trick is turn the burner off first and don't touch the jar to the bottom of the pot. I did and my kitchen smelled great all day, the bottom of the jar of my sausage seasoning broke right off.

Most times though, I just write the contents on a piece of paper or cut from the package and tape it (packing tape) to the outside of the jar (see the quinoa in the top picture) along with any cooking directions. It's less expensive that way, especially if it's a temporary jar.


Monday, March 31, 2014

Every Penny Counts

Yes, I know it's been a while, but life happens and well there you have it. So, just because I haven't posted in a while doesn't mean I haven't been busy doing those things that help save every penny I can. So without further ado, let me share what I've been up to.
Kidney, Black, Pinto, White Beans in tomato sauce


Canning Beans

Remember I posted a while back a dry bean to canned bean conversion chart? Well I did... Dried to canned beans conversion
One of those things that I hate is trying to remember to soak beans for tomorrow's meal, subsequently I end up buying canned beans because I forgot. I did a bit of looking around on the internet to locate simple canning instructions for beans. Most tell you to soak your beans overnight, LOL. So, I made my big plans for canning beans to use in meals and finally got it done. The results were mostly good, but I learned a few things.
1. Black beans do not need to be soaked. Measure 1/2 cup of dried beans into pint jar. Add 1/2 tsp salt (optional) per pint jar. Fill with boiling water, leaving 1" head space. Process in pressure canner* for 75 minutes.
2. Pinto, kidney, white beans should all be soaked. They did not work as well starting from dry.
Instructions for canning all other beans (you can do black beans this way too.)
  • Remove any foreign objects from beans
  • Place in large bowl and cover with water (remember, the beans will swell so leave plenty of room)
  • Soak overnight
  • Drain and rinse beans
  • Place in large pot
  • Cover with 2 inches of fresh water
  • Bring to a boil, stirring frequently and watching to prevent boiling over
  • Ladle beans into hot jars (no need to sterilize as long as they're clean and hot), leaving 1" headspace
  • Fill with cooking liquid, again, leaving 1" headspace
  • Put lids and rings on jars
  • Place jars in pressure canner and process at 10 pounds pressure (You will need to adjust your pressure depending on your altitude.):
  • Pints for 1 hour, 15 minutes
  • Quarts for 1 hour, 30 minutes
  • Remove from canner and let cool, checking all lids for proper seals before storing
Notes:
* Beans MUST be processed in a PRESSURE CANNER, a water bath does not reach the correct temperature to kill all the bacteria.

3. Home canned beans tend to soak up water and the beans at the top of the jar are not usually covered by water and may change color (there is nothing wrong with them). What I really discovered is that store bought beans are covered by liquid, so I'm buying more liquid than beans.
4. Ingredients of home canned beans: Beans, water, salt. Ingredients of commercially canned beans: Water, beans, calcium chloride, calcium disodium edta (added to promote color retention). Note that water is the first on the ingredients list, yep, that's what you are buying. Additionally, I looked up the other ingredients; Calcium chloride, CaCl2, is a salt of calcium and chlorine, Calcium disodium EDTA is mainly synthesised from ethylenediamine, formaldehyde, and sodium cyanide. The FDA has approved these items for human consumption and they are used in the medical field for such things as radiation poisoning and treating lead poisoning, however I don't think it should be in my food.

Okay, so that is my rant for the day. Not only am I saving money by canning my own beans, I have beans ready for a meal and I don't have to remember to soak them overnight, also I am keeping some stuff out of my diet that I didn't ask for.

Saturday, May 12, 2012

Growing Salad Greens in Window Boxes


Don't let a lack of garden space keep you from growing and enjoying fresh veggies! With this plan, you can start harvesting fresh, flavorful, nutritious salad ingredients in about a month.

Tools and Materials
Two planters at least 8 inches deep (such as window boxes), with drainage holes
Seeds: radishes, mesclun mix, baby carrots, beets (shredded raw beet is a tasty and colorful salad topping)
Soilless potting mix enriched with compost
Fertilizer

1. Moisten your potting mix. If you wish to use a slow-release fertilizer, add it as recommended by the product label. Fill window boxes, and firm soil gently in place.

2. Following the directions on the seed packets, sow seeds of radishes and greens in one box, beets and carrots in the other. Radishes are ready to harvest about 28 days after germination; baby greens (lettuce, spinach, mesclun), in 30 days; beets, in 55 days; baby carrots, in 70 days.

3. Water gently so that you don't wash seeds out of the soil. Keep soil evenly moist, and watch for seeds to germinate.

4. Seedlings will come up thickly; thin them the first time to stand 1 inch apart. You can either pluck them out individually or use scissors to snip seedlings at the soil surface. (Eat the thinnings of greens and beet tops -- your first unofficial harvest!) Thin the carrots and beets again when they've doubled in size; ultimately they should stand 2 to 3 inches apart.

5. Fertilize every two weeks, unless you used a slow-release fertilizer at planting time. Use a water-soluble formula, such as fish emulsion.

6. Sow some more. As your harvest of greens and radishes makes room in that container, prepare to grow another round. Work an inch of compost into the empty spots and sow more seed.
Tips

If you have enough space, add containers for other salad favorites, such as tomatoes and cucumbers. (They need larger pots.)

Watch out for pesky squirrels -- they like to dig in freshly disturbed soil. If they're a problem, cover your planters with wire mesh or fabric row covers.

For color and spicy flavor, sow a few nasturtium seeds in your containers. The flowers are beautiful, fragrant, and tasty in a salad!


http://local.garden.org/How_To_Project_Growing_Salad_Greens_in_Window_Boxes_Spokane_WA-r1216559-Spokane_WA.html

Thursday, May 10, 2012

Growing Vegetables in Containers


If you don't have room for a garden, or only want to grow a few vegetables, planting in containers is the best way to go. Almost any vegetable can grow in a container and with a little care can produce abundantly. Here's how to get started.
Tools and Materials
Containers of various sizes
Sterilized potting soil
Shovel
Trowel
Drip or hose irrigation
Fertilizer

It's all in the pot. When selecting a container, remember that bigger is better as far as ease of maintenance and size of harvest. Half whiskey or wine barrels or similar-sized pseudo terra-cotta containers are large enough to accommodate vegetables such as large tomatoes, eggplant, and squash, with room to spare for companion plantings of smaller choices such as carrots and lettuce. Five-gallon containers can hold dwarf tomatoes, peppers, beans, and many small leafy greens. A window box is even large enough to grow radishes and arugula.

And in the soil. For proper drainage, containers need to have holes in the bottom. Also, use only sterilized potting soil. Garden soil may contain diseases and may not be well drained. Because you're planting in such a small space, you'll have to be very conscious of watering and fertilizing regularly. Water with drip irrigation or by hand whenever the soil is dry 4 to 6 inches deep.

Fertilize every two weeks with a water-soluble fertilizer for vegetables, or add controlled-release fertilizer at planting time, supplemented with a water-soluble fertilizer when needed. For large containers, mulching with straw or bark conservs moisture.

Best plant combinations. Containers allow you to plant combinations that are both edible and attractive. For example, try creating a salad container with different colors of leaf lettuce, a bush cucumber, a dwarf patio-type tomato, and even herbs such as parsley. How about a tomato sauce barrel with a tomato plant in the center, herbs such as oregano and basil on the sides, and onions interplanted between the herbs? Or a root crop roundup container with beets, carrots, radishes, onions, and parsnips in a foot-deep container?

Tips

Choose bush varieties of large vegetables such as squash.

Production may be less than with full-sized kinds, but plants will be much easier to care for.

To save space, consider growing some plants up. Choose pole beans over bush beans, and trellis them along the back of a container. This leaves space in front to plant other vegetables.

Photography from the National Gardening Association.

http://local.garden.org/Growing_Vegetables_in_Containers_Spokane_WA-r1216583-Spokane_WA.html

Tuesday, May 8, 2012

Vegetable Garden


You can plant many crops directly in the garden, especially root vegetables, crops with large seeds, and seeds of plants that can mature within your growing season. The correct time to plant each crop varies widely according to the climate where you live and the specific needs of each crop.
Tools and Materials

Soil thermometer
String and stakes
Measuring tape
Steel rake
Hoe
Vegetable seeds
Water source
hose
watering can
Floating row cover, optional


When to plant. In general, plant cool-season crops (peas, lettuce, greens, cole crops, and root crops) so they can mature before the onset of mid-summer heat or freezing autumn weather. Some, such as peas and spinach, will germinate in soils as cool as 40° F. Most cool-season crops will germinate and grow if planted about two weeks before the last spring frost.


Plant heat-loving, warm-season crops (such as squash, beans, corn, melons, and cucumbers) only after the soil has warmed, about two weeks after the last frost in spring. These crops require soil temperatures between 60° and 70° F.


Choose planting pattern. Plant most seeds in 1- to 3-foot-wide beds instead of single-file rows. Wide row planting reduces weeding and watering needs and increases the yield per square foot by decreasing the space needed for paths between rows. Single-row planting works best for corn and climbing peas and beans. Plant vine crops (squash, cucumbers, gourds, and pumpkins) in 1-foot-square beds, spaced 3 to 6 feet apart. Plant 4 to 6 seeds in each bed.


Prepare soil. When the soil is dry enough to crumble after squeezing and warm enough to plant, add compost and other amendments, as necessary (see "Preparing a New Garden Plot"). Mark the rows with string and stakes, if desired, leaving 2- to 3-foot aisles between rows. Smooth the soil in the rows with a steel rake. Break up large clods and remove stones and debris.


Sow seeds. Plant seeds at a depth equal to two to three times their diameters and as far apart as recommended on the seed packet. In wide row plantings, you can space large seeds, such as beans, on the soil surface and then push them into the soil with your finger. Scatter small seeds, such as carrots, over the prepared row and sprinkle soil over them. Tap the soil gently with the back of a hoe or the palm of your hand. In single-row plantings, make a furrow at the proper planting depth with the corner of a hoe blade. Space the seeds in the furrow and cover with soil.


Water and care. Water the planted rows with a gentle spray from a hose or watering can without disturbing the soil. Keep the soil evenly moist, especially while the seedlings sprout and become established. Protect from frost and grazing animals with a floating row cover, if necessary.
Tips


The number of days listed on the seed packet refers to the time needed to mature a crop after sowing seed or transplanting into the garden. Choose varieties that can ripen within your growing season.


If your space is limited, try compact vegetable varieties; crops that provide a high yield per square foot, such as root vegetables; and trellises for vining plants.


Photograph by National Gardening Association.


http://local.garden.org/Planting_a_Vegetable_Garden_Spokane_WA-r1216574-Spokane_WA.html#

Monday, May 7, 2012

Reclaiming Yarn from Old Sweaters

Fair Warning: I have not yet tried this, but do plan to in the future. This tutorial is from laughing purple goldfish designs. It seemed like such a great idea, I thought I would share.


laughing purple goldfish designs blog:

Much of yarn recycling is trial and error... and everyone develops their own little techniques along the way. I have put together a series of photos which step you through my recycling process, to give you an idea of what is involved.

You will certainly have a million questions for me, especially once you actually start experimenting with the process. Ask away... I'll share everything I know with you!

There seriously are loads of photos here, but the basic steps I follow are:

air the garment
remove trimmings and tags, and undo seams
unravel each piece
wind into a skein
wash
dry
ball

If you are a beginner, I would recommend starting with a single coloured garment, preferably in a simple stockinette. I would avoid cables, fair isle, and anything complicated... until you have had a little practice first. Stick with a standard jumper if possible, and avoid cardigans, coats, or anything with a zipper. A hand knit would be ideal, if you have access to one. Avoid any yarn which looks fluffy or furry or hairy or boucley... because they will be difficult to unravel.

Before I start, I always check the seams. There are 'good seams' and 'bad seams' when it comes to recycling. Overlocked or serged seams are BAD. You will find that the yarn has been cut at the end of every row... so you will end up with lots of short yarn pieces... ugh! So always check the side seams and inner arm seams.

Don't worry if the shoulder or neck seams are overlocked. Because they run across the top of the garment and not down the sides, they are not of concern.

so... some examples of bad seams:


and these are good seams:


So... if the side seams are bound together by overlocking - BAD!

As for hand knits... all of their seams are GOOD... you don't even need to check them!


Time to get started now...


I don't bother washing the garment before I start. Two reasons... Firstly, I don't want to risk any felting or matting of the yarn fibres which would make it more difficult to unravel. Secondly, the yarn is cleaned much more effectively if you wash it AFTER it is skeined.


So I just leave it out on the line for a while, just to 'freshen' it before I start working with it.


I use an unpicker and a pointy pair of scissors to remove tags, labels, buttons, zips, and any other trimmings.


Then I unpick the seams. Most store bought jumpers are seamed using chain stitch, which is wonderfully easy to undo. See the way the chain stitches form little arrows, pointing down in the photo? Well that tells you the direction to unravel in. So cut the top one, free the tail... and pull... it should unravel in seconds.


So now you have all the seams undone (this one had a seam down the centre of the back piece for some strange reason - probably a design feature)


Now it's time to start unraveling each piece, generally working from the top down. The cast off edge forms the same V stitches as chain stitch, and again they point in the direction you need to unravel. So start at the top end and snip, free a tail... and away you go.

Sometimes you might have a hard time getting started. If it's a nightmare for you, just chop the top few rows off, and then start unraveling. You will only loose a few yards of yarn, and it will save your sanity!


I like to roll the garment piece, so I can grip it nicely while I unravel.


I have heard this kind of display referred to as 'yarn barf' and I think it's a wonderful description.

Anyway, if I am working indoors and am going to be able to skein the yarn immediately, then I just pile it on the floor as I unravel. If I am working outdoors I would wind into a ball as I go, and then skein from that... because you really don't want to get this in a tangle!


You can wind your yarn into a skein using two chairs like this...


Or using a skein winder if you have one. This one was a fabulous gift from Mr Goldfish last Christmas... and I love, love, love it!


Once it is all wound on, you need to tie the skein in a figure eight. Use some scrap yarn. I like to use a contrast from the yarn you have wound, so that the ties are easy to locate and removed after drying. I recommend using a light colour, because you would cry if the colour ran from your ties onto you nice new recycled yarn.

First divide the yarn in half as pictured above.


Then pop a scrap piece of yarn through like this...


And back through again, forming a figure "8" with the tie.


Finish with a double knot.


I like to do this in six places around the skein to prevent tangling.


Wash by soaking in warm water and wool detergent. I'm a big fan of Martha Gardener's Eucalyptus Wool Mix, but I'm not sure if it is available outside of Australia.


Gently submerge the skeins. I prefer to soak all the yarn together, so that if it happens to lose any colour, all skeins will be affected evenly.


If possible, I leave it to soak overnight.


Then in the morning, I rinse it in a bucket of cold water.


Of course, with our current water restrictions here... that rinse water gets recycled directly onto my garden...


I gently squeeze the excess water from the yarn, and lay the skeins on an old towel.


Then I lay another old towel on top.


Roll it up, and walk up and down the length of it for a minute or two. This helps absorb a significant amount of water from the skeins.


Then I hang each skein on a plastic coat hanger to dry. I also use a second hanger to 'weight' the yarn slightly, and help stretch some of those kinks out.

If the weather is wet, then I put the coat hangers along a curtain rail in a sunny window and dry the yarn indoors.


When dry, cut the ties off and place the skein back on to the winder or chairs. Find the end and wind into a ball. Click here for my ball winding tutorial.


Interestingly the yarn I have claimed from this jumper is not that nice. I'm actually a bit disappointed with it. It looked nice in the garment, but is now a bit ugh! See the sheen in the balls. That is the rayon component. I liked that sheen until I started unraveling...


You can actually see the cotton and rayon strands here.

The rayon is harsh and grabby and kind of brittle. It actually reminds me of over bleached hair. I'm thinking it may well become hair on a creature or doll at some point. If I want to knit or crochet with it I think I will have to ply it first. I might even ply it with a different yarn to make my own special blend.

I guess the thing is, not to give up... occasionally you get a bit of a dud (like this one) but that just pushes you to think of alternate project ideas.

Most of what I have learned on this topic is through experience, but if you would like to check out the tutorial I first read on the topic, then click here.

http://laughingpurplegoldfish.blogspot.com/