Tuesday, April 8, 2014

The Growing Season is Around the Corner

My windowsill starts
Have you started your seeds yet? It isn't too late for some of your veggies like tomatoes, peppers, and pumpkins. There are even some seeds you can plant out now, lettuce, onion seeds/sets, and cauliflower. 

Just a reminder though, don't get too vigorous with your planting yet, the last frost may occur in the first week of May. 

Okay, having said that I usually get my seeds in the ground in mid-April, 1st week of May. My garden is usually pretty successful.
My garden on August 17, 2013
I didn't use the space efficiently and it was a new spot so I didn't choose wisely for the sun, but I wasn't totally disappointed with the harvests. Again having said this...this year we have different plans. 

First, I decided where I am placing my plants based on the knowledge obtained last year as to where the sun hits and when. 

Second, I laid out my garden plan using a free garden planner I found at Growveg.com. You get a 30 day free trial of the planner and you can definitely plan out your garden space in that time. I was impressed with this website. 

Third, instead of burying my potatoes, I am going to try towers. I found a great plan at Growing Lot Suburban Farm. I will putting up 2 of these one with russets  and one with reds. 

Fourth, we are repurposing as much as we can including using a trampoline frame and free discarded wood to make a greenhouse. I'll post pictures of that later.  There are several "plans" out there, but some of them don't make a bunch of sense so we are doing it Jeff's way. But if you want to see what one can look like, check it out here...Organic Adventures in Farming. We also pulled some old metal shelves from the fabrication pile and have using other materials we had lying around, we now have starter shelves for our greenhouse. 

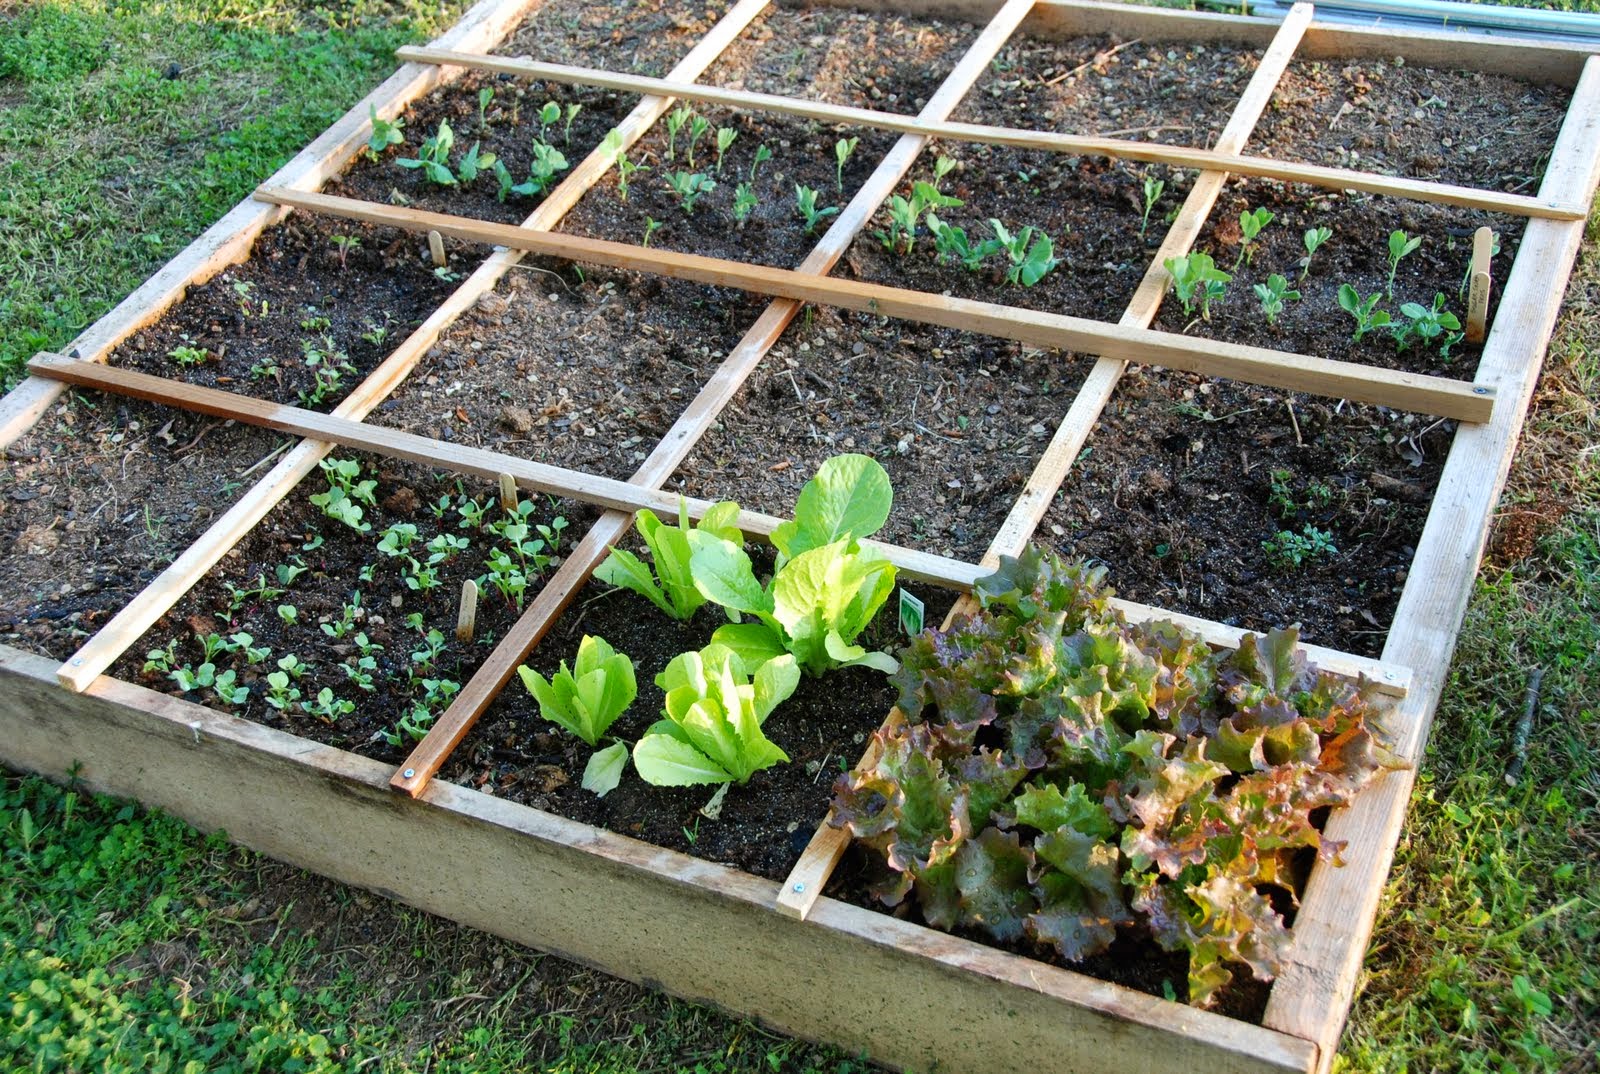
And finally, I am going to experiment with Square Foot Gardening. I've never tried it before, and in my case I have tons of room for rows, but the thought of planting 99 green bean plants is a bit overwhelming, but when it's laid out in a grid like this, it doesn't seem so daunting. We collected used 2" x 6" deck boards and have built our boxes. We had enough left over to build a couple for a daughter as well. I just happened to have some slats under my woodworking bench, so grids are no problem. This could be a way to reclaim some of my backyard.
photo courtesy of http://www.versusbattle.com
You can find pros & cons at VersusBattle.com of either SFG or row gardening.

Good luck and good gardening!


Friday, April 4, 2014

Every Penny Counts part 3

Homemade is Better.
One of the things that helps me out is making my own spice, cream of soup and coating mixes. I don't have to purchase the name brand products and I control the ingredients.
I have a tendency to forget what goes in stuff, so I keep
the 'recipe' taped to the inside of my spice cupboard.

Cream-Of Soup Mix

2 cups dry milk powder (non-instant is preferred) Dairy Free? Use rice milk powder.
¾ cup organic cornstarch
1 teaspoon onion powder
½ teaspoon dried thyme
½ teaspoon dried basil
½ teaspoon dried parsley
¼ teaspoon black pepper
Mix all ingredients together with a whisk. Store in an airtight container.

To make into soup:
Combine 1/3 cup dry mix with 1 ¼ cups water in a small saucepan. Whisk until smooth.
On medium heat, bring to a boil. Cook and stir for 2 minutes, until thick. Cool.

This amount = 1 can condensed cream-of soup.

For Cream-of Chicken Soup: use 1 ¼ cups chicken broth instead of water.

For Cream-of Mushroom Soup: use water; add ¼ cup diced, cooked mushrooms to soup after it thickens

For Cream-of Celery Soup: use water, add ¼ cup diced, cooked celery to the soup after it thickens or add a dash of celery seed to the mixture while it’s cooking.

Coating Mix (Shake & Bake)

1 c. very fine bread crumbs
1/4 c. flour
1 tsp. poultry seasoning
1 tsp. paprika
1 tsp. salt
1/2 tsp. pepper
1/4 tsp. onion powder

Mix ingredients together and store in airtight jar. 

Eleven Secret Herbs (close enough to KFC)

6 tablespoons paprika
3 tablespoons onion salt
3 teaspoons celery salt
3 teaspoons rubbed sage
3 teaspoons garlic powder
3 teaspoons ground allspice
3 teaspoons ground oregano
3 teaspoons chili powder
3 teaspoons black pepper
3 teaspoons basil leaves, crushed
3 teaspoons marjoram leaves, crushed finely

Mix together and store in an airtight container. Mix together 4 teaspoons mixture, 1 cup flour, 2 tablespoons packed light brown sugar and 1 teaspoons salt (optional). Place in a doubled plastic food bag and add chicken to coat. Fry, drain on paper towels, serve!

Emeril's Southwest Seasoning

2 tablespoons chili powder
2 teaspoons ground cumin
2 tablespoons paprika
1 teaspoon black pepper
1 tablespoon ground coriander
1 teaspoon cayenne pepper
1 tablespoon garlic powder
1 teaspoon crushed red pepper
1 tablespoon dried oregano
1 tablespoon salt (optional)

Mix together and store in an airtight container. Use to taste.

Taco Seasoning Mix

1/4 cup Chili Powder
1/4 cup Cumin Powder
1 tablespoon Garlic powder
1 tablespoon Onion powder
1 teaspoon Oregano leaf (or oregano leaf powder)
1 teaspoon Paprika
1/4 cup Himalayan salt or Sea salt (optional)
1 teaspoon ground pepper

Mix together and store in an airtight container. 3 tablespoons equals one packet of commercial product.

Sausage Seasoning - Hot

8 tablespoons Sea Salt
1 cup + 2 tablespoons ground Black Pepper
8 tablespoons Nutmeg
4 tablespoons  Sage

Mix ingredients and keep in an airtight container. Use 1 tablespoon per 1 lb of browned ground meat.
(I've mixed this in raw meat and placed it in the freezer for use another day.) It is very hot.


Wednesday, April 2, 2014

Every Penny Counts part two

Don't you hate it when you open a package of whatever (baking powder, granola, noodles) and don't use them all right away? I know I do. For instance, baking powder and baking soda, I don't use them daily, weekly or even monthly. So they sit in the cupboard and well...age out. I also hate having to throw them away. One way to extend the life of these dry goods is to vacuum seal them.

Many moons ago I purchased a Food Saver® vacuum sealing system. I only use the rolls, only because not everything I seal up is the same size, but if you like you can purchase bags. I use this to vacuum seal bulk meats mostly, but I've used it for soups, vegetables from my garden and important documents (i.e.birth certificates). I also use it to extend the life of those things I don't use very often, such as baking powder.

Opened and not used up.
Instructions for cooking the Quinoa taped on back of jar.

Food Saver® brand vacuum sealing system
Food Saver® is but one brand, there are others out there, this is just what I happen to have. Items that you will need are jars (1/2 pint, pint, quart or half gallon), lids to fit the jars and a sealing system. If you are going to seal powdery items (soda, confectioners sugar, flour) be sure that you wipe the rim of the jar with a damp paper towel and always leave 1" headspace. 

When I did my confectioners sugar, there was sugar EVERYWHERE!

Sometimes it does not seal the first try or the second or the third. It usually means something is wrong. I tried several times on one jar and then checked the rim, yep, there was a chip, silly me. Once there was extra rubber on the lid, not an issue if you are heat canning, but it is when vacuum canning. Another time, powder had seeped into the sealer and a vacuum couldn't be formed. With a little patience and a bit of observation, almost all jars will seal...except fancy jelly jars. Nope, they don't seal. I tried, I really did, but no, it was not gonna happen.


Vacuum sealing is not a replacement for heat canning. 

It should be used for dry goods or freezer only. 

See those bread crumbs, opened but not used up. Now I can use them later.
As to those spiffy labels, I found them online at Canning Homemade. Wonderful to work with, but a hint here as well. These are shrink sleeves, you dip the jar into a pot of boiling hot water, the trick is turn the burner off first and don't touch the jar to the bottom of the pot. I did and my kitchen smelled great all day, the bottom of the jar of my sausage seasoning broke right off.

Most times though, I just write the contents on a piece of paper or cut from the package and tape it (packing tape) to the outside of the jar (see the quinoa in the top picture) along with any cooking directions. It's less expensive that way, especially if it's a temporary jar.